Monday, April 30, 2012

Playing along with the Lily Bee sketch #8

I decided to play along with this month's Lily Bee sketch. It really inspired me to step out of my comfort zone a little, but I enjoyed playing with it and making it my own. But I LOVED playing with their new "Hopscotch" line! It's sooo pretty in real life!

  "Done!"
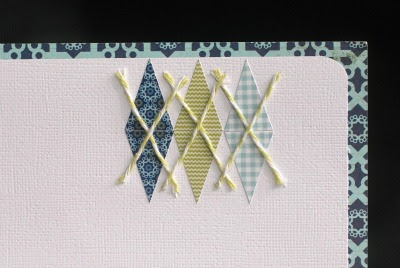
I chose to shrink the sketch to a smaller size and use one larger photo rather than several smaller ones. And since the sketch was smaller on my page I decided to add a little embellishment touch up in the corner. The argyle repeats the pattern on Mac's vest. ;)  To add a little depth and whimsy I swirled some twine across the page.
 some detail shots:


hint: I used the triangle banner stickers on top of each other to create the argyle diamonds. ;)  You'll be seeing this one again from me. I really like how it turned out. Oh, and I'm a sucker for some argyle. ;) I'm sure you'll be seeing more of IT from me too!

Hope you've started off to a good week!

Happy Monday!


Sunday, April 29, 2012

Lately...

Here's a little bit of what we've been up to lately. In no particular order...
 
We've done manis and pedis...

"Hopped" in to kindergarten, which
is to say next year's Kindergarteners got to 
tour the school and meet their potential teachers...

we've geared up to watch the Red/Blue game...

waited on brownies in the oven....

played in the driveway...

and played LOTS of softball (and posed
for team pics).
 
It's a BUSY life, but it's MY life. And I wouldn't trade it for the world!
 
Happy Sunday friends!
 

Friday, April 27, 2012

Beautiful captured

While we were waiting on the design team announcement, some of the girls over at the Nook decided to play another round of "Lift the person above me"on the message board . Simply put, you scraplift the person who replied to the conversation immediately before you.  Of course I jumped in, and I got to lift the incredibly talented Soraya from France. I also chose to use my new May kit!

"Beautiful captured"
The journaling reads, "This series of pictures PERFECTLY captures your sweet bashful side of your personality. I love the expressions on your face and the way you are chewing on your fingernails. It's SO you! I love it! 3/12"  I also love this collection from Echo Park! It goes so well with the girls clothing, and it's so stinkin' easy for me to use! I love everything about it!
 
And some detail shots: 


Scraplifting Soraya was a little bit of a stretch for me. I never would have put a square frame placed where it is, and I probably wouldn't have thought to use all 5 pictures in a series like they are. In fact, about half way through I almost chose to start over and choose another layout of hers to lift. But I stuck with it, adding my own touches too, and I'm really happy with the way it turned out.

Thanks for stopping by today! Happy Friday everyone!


Thursday, April 26, 2012

Cards a Bella

I have a couple of cards up on the Bella Blvd. blog today. For this week's cards I chose to play with the "Sunshine & Happiness" collection and the new Designer Tape. Let me tell ya, I'm in looove. I'm finding myself reaching for the tape with almost every project now. It's quick, easy, and really versatile. And the bright colors in "Sunshine & Happiness" are right up my alley. I think it may be my absolute favorite Bella release. I can't stop creating with it.

"Sending you Sunshine & Happiness"

 For this one I "ruffled" the tape just like I would if it were patterned paper. But of course since the tape is sticky the ruffles become like little flaps instead.

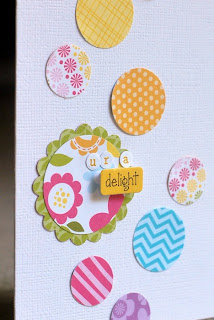
"UR a Delight"

This one I accredit to spending too much time on Pinterest. I actually got this idea from seeing different sized embroidery hoops hanging on a wall.

So there ya have it, my Bella Blvd. cards for this week.  Be sure to pop on over to the blog to see what the other girls have created. It's good stuff!

Wednesday, April 25, 2012

Nook news!!

There's exciting news to share from the Nook. They've just announced the latest designers that will be joining our team. Congratulations to:
Erika Gasser--France
Aleksandra Gadji--Sweden
Patricia Roebuck--US
Bente Fagerberger--Sweden

And returning member are:

 Leah Killian--US
Stacey Michaud--US
Carol Monson--US
Danni Reid--US
Jessy Christopher--Malaysia
Katarina Damm-Blomberg--Finland
Hilde Aaslund--Norway
Anna Sigga--Iceland
Marinette Lefevre--France
Lilith Eckles--Belgium
Shellye McDaniel--US
Pamella Brown--US
Gina Rodgers--Australia
Deanna Misner--US
Nicole Nowosad--Canada

I am honored and humbled to be asked back on to this amazing team. It's PACKED with amazing talent, and I'm so excited to get to work with these ladies for another term! Thank you Pam and Leah for believing me! 
 ********

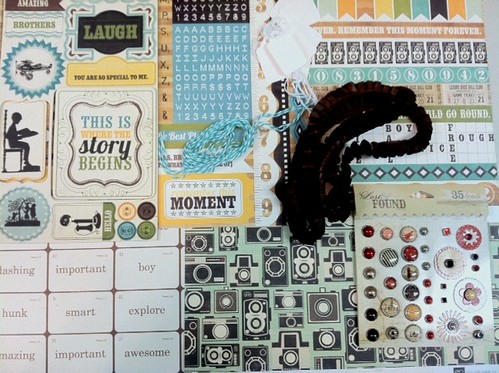
In OTHER news, the May kit from My Scrapbook Nook is here and it's sitting on my table as I type! Isn't it gorgeous?  This month's kit features Echo Park's This and That "Graceful" collection with additional ruffled trim, Maya Road canvas butterflies, button straight pins, bling/jewels from Petaloo, and some gorgeous coordinating chipboard!

And this month's Grab Bag:
Not to be outdone is this month's Grab Bag. You asked for it and Pam has answered! The last few month's grab bags have all sold out, so you need to get this one while you can! This month's Grab Bag features paper from Echo Park's This and That "Charming". And remember, if you join the club in May you receive the June kit for FREE along w/a free June Grab Bag. You will also receive another free kit after 12 paid months! Two FREE kits and a grab bag when you sign up for 12 months!

Happy, happy Wednesday!


Tuesday, April 24, 2012

In case you need an idea

In case you need an idea for your child's teacher (and since I don't have much more to write abou) I'll share this. It's Teacher Appreciation Week at Caroline's school. One of the "things" they do to let their teacher know how much they're loved is to decorate their classroom door with thank you notes. I was in charge of her teacher's door. And I'm all about a good pun.


I used my scrap supplies to make cardstock fortune cookies and inside each one was a slip of paper from each child saying thank you. To make the cookies I watched THIS video tutorial, and then tweaked it to make larger ones. Also, cardstock is stiffer than fortune cookie paper, so it wasn't quite as easy as the girl in the video made it look. But it wasn't overly hard either. It just took a bit of trial-and-error.

So maybe this will be helpful to someone. The idea would make a cute card or maybe a little take-out box filled with fortune cookies and notes. It WAS nice to use my supplies for something "real". For some weird reason it helped me justify in my mind that all these supplies are worth it.  Because, you know, I always say, "These m might be useful someday."  And today they were. ;)

Happy Tuesday, friends!


Sunday, April 22, 2012

Milk jug seedlings thanks to Pinterest

I think it's safe to say that almost everyone has heard of Pinterest now. It's such a fun site to go and browse. I've gained A LOT of inspiration from some of the posts there, but sadly I usually forget to apply them to my everyday life.

But THIS is an exception. Thanks to Pinterest I've found a cheaper way to plant, maintain, and establish my vegetable seedlings for our garden.

One day I read somewhere on Pinterest to try putting your seeds in used, washed out milk jugs (the link is now gone). Up until now, I've bought those ridiculously expensive (relatively speaking) indoor greenhouse kits that come a tray with little peet rounds for you to plant your seeds. Since money is tighter this year, I thought I'd give this Pinterest milk jug idea a try.  So here's how I went about it...


First, I cut the milk jug in half.
Filled it with 1/3 garden soil mix.
Added my seeds according to their package instructions,
then duct taped the top of the milk jug's top back to its bottom.
On the outside I taped the seed packet as a label. (These also held extra seeds.)
 
 Now I didn't say they were pretty, but here they are all lined up just outside the bed where they'd 
eventually be planted. What's also nice about the jugs is that they're portable. When the nights got a little cooler, we'd bring them in. Otherwise they received the same sunlight that they would in the garden.

 
The way you water them and check on their progress is through the opening at the top. This was perfect
for the kids to help or to use the hose to give them a little sprinkle.


 Eventually the seedlings grew. A lot. I opened up their top so they'd grow taller. I also thinned the ones that were weaker so that the stronger ones could grow even bigger.  Now I have extras with no place to put them in the garden. That's a first.


The tomatoes needed thinning.
They did really well.


And finally, some have already been planted in their raised bed. Usually with those peat pot/greenhouse
kits, this is the stage where my seedlings would grow weak stems and ultimately become unsuccessful. Though I've tried every year to grow my plants from seed, I've always ended up going to my home improvement store to buy mature plants instead. But so far these guys have hung in there and done really well. I'm excited! Yes, it's the little things in life that bring me joy. These are my squash, zucchini, anda few okra plants.

So right now I'm a big fan of the "milk jug" seedling project. It's much more cost efficient AND my seedlings are doing well. Knock on wood. I can't wait to see if they'll come to full fruition! 

Thank you, Pinterest.  Because of you I may have a full garden this year at a much cheaper expense! hip hip hooray!
Thursday, April 19, 2012

Fun with Unity Stamps

This week we Bella girls were asked to make a couple of cards using our Unity stamps. I was also given the requisite that I had to use the Sunshine &Happiness collection, SO I just got a little creative.

"Sending you Sunshine"
This sticker sentiment sparked the idea of having 
the little birdie carry a ray of sunshine in his bundle 
instead of a baby. The bird is stamped onto the blue 
chevron and then popped up so that the sun could
 fit behind the bundle.

"Hang in there"

Can you tell I had a lot of fun creating this one?
Not only did I hand-cut all the stamped images 
and little pink flowers, but I also added some 
washi tape to cardstock then used a border punch to 
give it a scalloped edge. 

This was my first time to use Unity Stamps, and I have to say, I REALLY like them! I love that they're red rubber but that they're still able to cling to my acrylic block.  I think I've found a new scrap crush. ;) 

Be sure to check out what the other designer created with their Unity Stamps, as well as enter the GIVEAWAY to win some of your own. Check out THIS post for details!  

Have a great day!!


Wednesday, April 18, 2012

Oh Baby!

I've got a layout up on the Bella Blvd. blog today. I *may* have shared it here before, but I can't remember. I created it for CHA, which seems like forever ago already! lol! I used Bella's new Baby Girl collection. (which is PERFECT for our family--even my "baby" girls who are not so much babies anymore. The patterns are terrific!)

"Oh Baby"


I loooove this picture of Sarah Kate. Look at that bald head!! She was THE SWEETEST baby. Sigh. I miss those days. Thanks to more modern technology, I was able to make the overall picture black and white but leave her and her toy in color. I like the effect too. It makes a busy background disappear. And this collection was so easy to work with! I really love it! Look for more Baby Girl projects from me very soon!

Happy Wednesday!


April's Bella Buzz


It's up and ready to read!
You can find it here.
Inside you'll find a challenge AND a giveaway.
And I spy some online friends who are featured too.